
")
-
Lot Size
-
Home Size852 sqft
-
Beds2 Beds
-
Baths1 Bath
-
Year Built1972
-
Days on Market42
How to Create a Shibori Throw Blanket
- Real Estate Tips
- DIY, home decor
- November 24, 2020
If you love cozy throw blankets, why not personalize them to fit your unique style? Refresh your interior décor with this fabulous shibori throw blanket that you can easily make yourself!
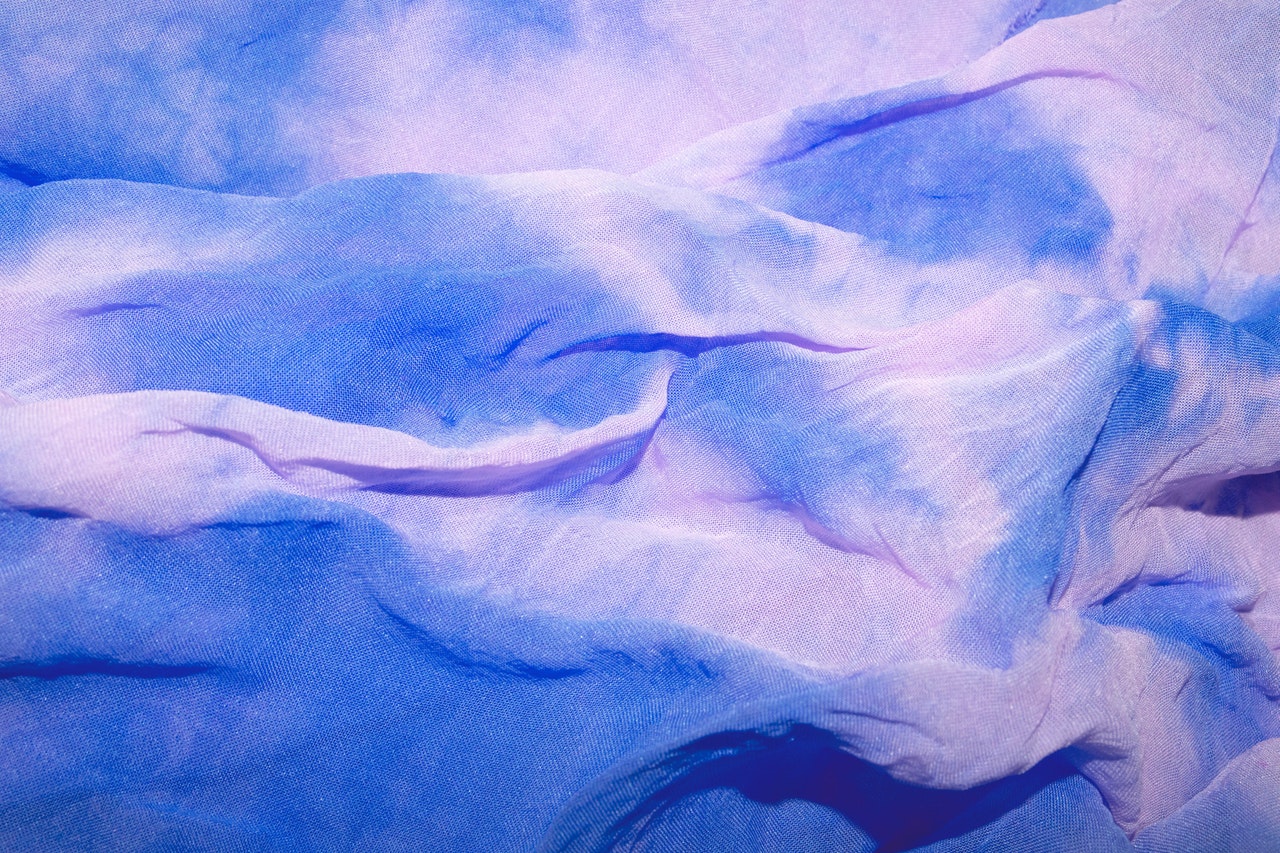
Shibori is an ancient Japanese fabric dyeing technique, similar to tie-dye, used to create visual texture to an otherwise blank canvas. There are many Shibori dyeing techniques, and they all produce equally gorgeous results.
These are four popular shibori folding techniques for fabric:
- Itajime Shibori: One of the most recognizable designs, this shibori technique creates a lovely square pattern throughout the fabric.
- Kanoko Shibori: Similar to traditional tie-dye, this shibori technique involves tying the fabric with rubber bands to create different designs. The dye will not penetrate where the rubber bands are placed, creating a striking contrast.
- Nui Shibori: Similar to the kanoko shibori technique, this style involves sewing. Using a basting stitch, you temporarily join the fabric during the dyeing process and then cut the thread once ready for the reveal. The tighter the stitch, the better your design will look.
- Kumo Shibori: This shibori technique creates bursting circles throughout the fabric. To start, place a bean on the fabric and then create a vertical finger using rubber bands to keep the bean in place on the tip. Make a few or a lot depending on how many sunbeams you want.
In this article, learn how to create your own visually arresting itajime shibori throw blanket in just a few steps!
What You Need to Create a Shibori Throw Blanket
- A white hemp, cotton, or silk throw blanket
- Navy or indigo fabric dye
- Bucket for warm water
- Long rubber gloves
- Plastic tote box
- Rubber bands
- Two square wooden blocks
- 1 cup of salt
- Apron
Creating the Itajime Shibori Folds
To make your itajime shibori design, start by folding the throw blanket horizontally, then accordion fold horizontally by going over and then under using the fabric. Then with your long folded blanket, you will accordion-fold once again until the blanket is a neat square.
Take two flat pieces of wood, or two wooden blocks, to sandwich the blanket–one piece on top and one underneath. Use several rubber bands, placed horizontally and vertically, to hold the two wood pieces in place.
Dyeing the Throw Blanket
Fill a plastic tote box with warm water and add the dye. Follow the directions on the dye bottle for proportions as every brand has differing instructions on how much water and dye to use. Add a cup of salt to the mixture once ready to help the fabric absorb the dye better.
For better color, add water to the folded fabric so that it is wet but not dripping. Then all you have to do is submerge your folded throw blanket into the dye mixture! If your dye mixture does not fully submerge the folded blanket, just keep turning it, spending a few minutes on each side.
After about 5 or 10 minutes, depending on how deep you want the blue color to be, you can rinse off your shibori throw blanket. When the water runs relatively clear, you can cut or remove the rubber bands to showcase your stunning shibori throw blanket!
")
")